

Lots of tutorials and inspiring projects using Stampin' Up! supplies, paper crafting and rubber stamping.
Tuesday, 20 March 2012
Mothers Day Card
This card was easy to make and very quick, especially using my new punches. I treated myself to the label punch and the postage stamp punch which is from the spring mini catalogue.


Wedding Card
This card is for my cousin who gets married on April 13th. The wedding season has arrived! The colours are rich razzleberry on very vanilla and I've added some interest to the background with some paper piercing.

I used a doily stencil I had as a guide for the paper piercing but a paper doily would also work.

I used a doily stencil I had as a guide for the paper piercing but a paper doily would also work.
Monday, 12 March 2012
Paper Sunflower Photo
This little sunflower was made for my little boy to give to his Gran on her Birthday.

I used photo editing software to print the photo out in sepia tones. I drew round a lid from a brad container and cut out the circle. I inked the edges a little using a sponge dabber and mahogany ink from the stampin' up distressing essential kit. The stampin up petal builder punch was used to cut petals from daffodile delight cardstock. Once the petals were glued to the back of the photo I glued the flower onto a green drinkling straw. I then glued a cardstock circle to the back of the flower to neaten it up.
I think it looks great.

I used photo editing software to print the photo out in sepia tones. I drew round a lid from a brad container and cut out the circle. I inked the edges a little using a sponge dabber and mahogany ink from the stampin' up distressing essential kit. The stampin up petal builder punch was used to cut petals from daffodile delight cardstock. Once the petals were glued to the back of the photo I glued the flower onto a green drinkling straw. I then glued a cardstock circle to the back of the flower to neaten it up.
I think it looks great.
Friday, 9 March 2012
Dunfermline Card Class
Handmade Greetings Card Class
These are the fruits of our efforts at the card class on 6th March. We used lots of techniques focusing on the stamp 'n' write markers.

This is an Easter card which we coloured using the stamp 'n' write markers and the blender pen, stamp set is every bunny. The colours are calypso coral and pool party. The mushrooms are stamped using the whisper white craft ink pad. I kept the design for this card very simple as our other card was more involved and I was mindful of time.

These are the fruits of our efforts at the card class on 6th March. We used lots of techniques focusing on the stamp 'n' write markers.
Easter Card

This is an Easter card which we coloured using the stamp 'n' write markers and the blender pen, stamp set is every bunny. The colours are calypso coral and pool party. The mushrooms are stamped using the whisper white craft ink pad. I kept the design for this card very simple as our other card was more involved and I was mindful of time.
Mother card

This card uses various techniques. The small flowers on the front were first stamped using the stampin' up, white staz on stamp pad. Then we coloured the images using the stampin' write markers, this gave a very soft and subtle look. The heart is stamped with calypso coral as is the sentiment. The background paper was inked around the edges with mahogany stampin' spot from the stampin' up distressing essentials set. The corner was curled and held in place with a brad. This card has a z fold and the unseen face has the same flowers as the front but these were done using the 'huff' technique. (another picture would be helpful, it's on the 'to-do' list). The papers are a freebie from this years SAB promotion.
Tuesday, 28 February 2012
Stampin' Up stash distraction
I'm sitting in the dining/play/craft room. Trying my very hardest to complete my Open University assignment, which is due on Friday.
However, I haven't put my craft stuff away properly (no-one will be surprised by that) and I can actually hear my stamp sets calling out to me and I just really want to make something. I have lots of ideas too since we had a stampin' up team meeting at the weekend and I've been inspired by what the other demonstrators have been up to.
This assignment is taking far too long. Must try to stay focused.
However, I haven't put my craft stuff away properly (no-one will be surprised by that) and I can actually hear my stamp sets calling out to me and I just really want to make something. I have lots of ideas too since we had a stampin' up team meeting at the weekend and I've been inspired by what the other demonstrators have been up to.
This assignment is taking far too long. Must try to stay focused.
Monday, 27 February 2012
Using Up some Paper "scraps"
Covered Mini Jotters
I used up some "scrap" pieces of designer series paper to cover these tiny little jotters and then I topped them with a collage effect image using the Charming set from the spring mini catalogue.

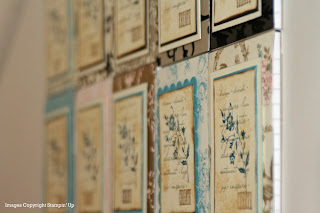
I used up some "scrap" pieces of designer series paper to cover these tiny little jotters and then I topped them with a collage effect image using the Charming set from the spring mini catalogue.

The collage was done using the distressing essentials set with the different ink colours layered on top of one another working from lightest to darkest. The final stamped image, the flower, was then heat embossed to add extra depth.

I was very impressed with the overall result and all done using up offcuts of paper.
Monday, 20 February 2012
My Stampin' Up blog featured in DIY home sweet home
My decorated magazine files was chosed on diy home sweet home to be one of their features. Thank you very much.

Scrapbook Tips for Busy Mums
I have had such a hectic week. First I was ill and now CK is ill. He's also contageous so he's been confined to the house. Hubby is at work so I've had the task of amusing him all to myself, lucky me. I don't know if it's all three year old boys or just mine, but they do not do well indoors.
I've had very little time to do any crafting but what time I have had I've tried to use wisely. I'm way behind on my scrapbooking (haven't even done Christmas yet), so I've made a plan to get caught up.
Firstly I chose my photographs and then I did a very rough sketch.
I trimmed all my paper, chose my embellishments and settled on my final layout.
Then I did another sketch of exactly where everything was and wrote my journaling under that sketch.

Next everything inside the plastic protector and I went on and did another two pages in exactly the same way.
Now what I have is not one finished page. Instead in the same time It would have taken me to do one complete page I have three pages that only need to be glued. I will pop my album in the car, along with my snail adhesive (because it's no mess) and when Cameron is up and around and back to his routine instead of having coffee while he's at playgroup or swimming etc I can finish my pages.

Just make sure that your final sketch is a good one ie all the elements of your layout are marked clearly, otherwise you'll return to it and have no idea what you had decided upon. Also Use up your background papers that already have some layout details on them to speed up the prep work as some of it will already be done for you.
I've had very little time to do any crafting but what time I have had I've tried to use wisely. I'm way behind on my scrapbooking (haven't even done Christmas yet), so I've made a plan to get caught up.
Firstly I chose my photographs and then I did a very rough sketch.
 |
Then I did another sketch of exactly where everything was and wrote my journaling under that sketch.

Next everything inside the plastic protector and I went on and did another two pages in exactly the same way.
Now what I have is not one finished page. Instead in the same time It would have taken me to do one complete page I have three pages that only need to be glued. I will pop my album in the car, along with my snail adhesive (because it's no mess) and when Cameron is up and around and back to his routine instead of having coffee while he's at playgroup or swimming etc I can finish my pages.

Just make sure that your final sketch is a good one ie all the elements of your layout are marked clearly, otherwise you'll return to it and have no idea what you had decided upon. Also Use up your background papers that already have some layout details on them to speed up the prep work as some of it will already be done for you.
Saturday, 11 February 2012
Decorated Magazine Files
I bought some magazine files from ikea a few months ago and they're very practical, cheap but a bit boring. I decided to re-vamp them.
First it got a coat of white acrylic pain which I sanded lightly with some fine sandpaper.


First it got a coat of white acrylic pain which I sanded lightly with some fine sandpaper.

Using the Greenhouse Garden and precious butterflies stamp sets. I stamped my design in pool party, island indigo and real red.

The ink took a while to dry on top of the acrylic paint. The ink used is water based (so water soluble) so and water near this would absolutely ruin my design. They're stored in my dining/craft/play room on a high shelf so it's a risk I'm willing to take. Maybe a mistake, watch this space.
Subscribe to:
Posts (Atom)