Pages

Showing posts with label handmade. Show all posts

Friday, 10 January 2014

Exploding box

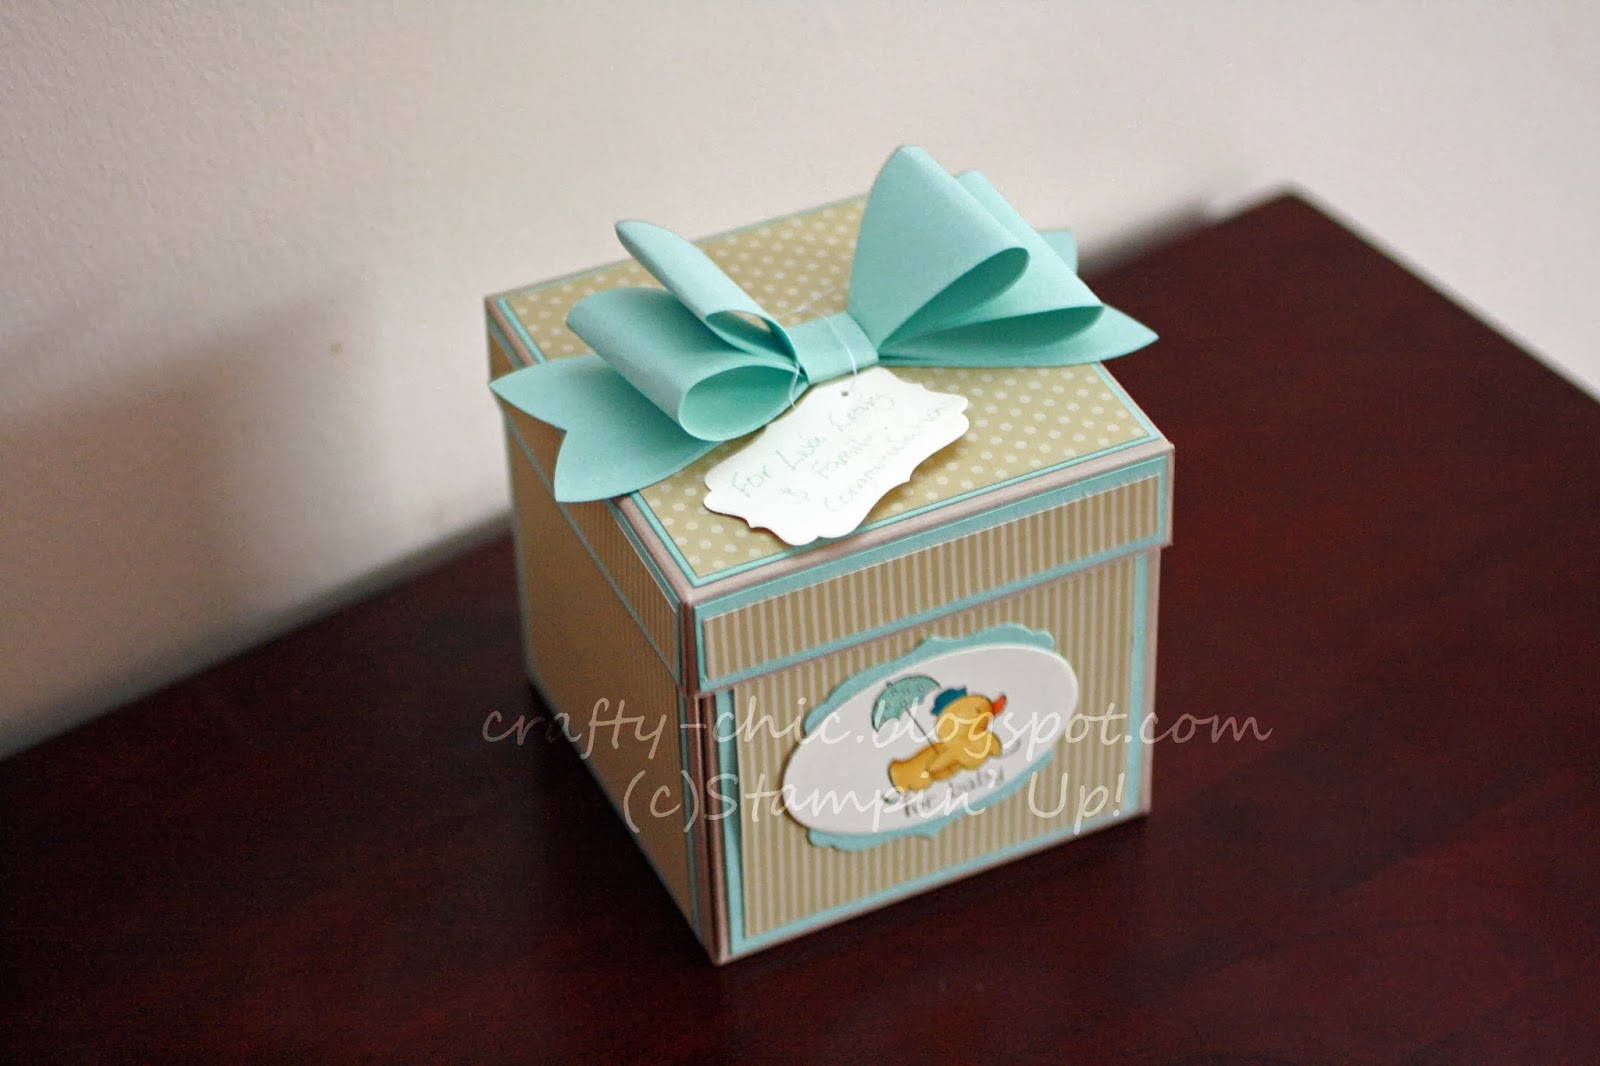
Exploding box keepsake


This cute little box "explodes" when you remove the lid.


Inside I've put a little pair of paper booties, which I made using a free printable template. Which you can find here Booties template.

They were pretty easy to put together and just a little bit fiddly. I used my cricut to cut the shapes and the letters (decided to use that as it's not seen daylight for almost a year and I was a bit short on time) otherwise a nice alphabet stamp would be lovely and a die cut shape. I used up some of my dsp's which have now been discontinued but I have some left so I want to use them.

A nice pool Party bow using the new die finished off the top nicely and the duck on the front is from the easy events set (sadly not a current catalogue item).


There are a lot of possibilities with this and it's a versatile deign which is easily modified to use what you have.

Stampin' Up! supplies can be bought from my on line store Maria Kitching stampin' Up! store

Supplies used:

Gift Bow Bigz L Die, 129977, £28.95
Decorative Label Punch, 120907, £15.50Pool Party A4 Card Stock, 124391, £6.25
Crumb Cake 12 X 12 Smooth Card Stock, 124274, £5.50Labels Collection Framelits Dies, 125598, £22.95Ovals Collection Framelits Dies, 129381, £22.95

Thank you for stopping by!!

Monday, 9 December 2013

Christmas Cards, so easy a four year old could do them!!


These cards were super simple to do and my little boy just LOVES to craft!!


The background is stamped in silver with the gorgeous grunge set.


A piece of red tape was used to make the glittered line (I positioned the tape for him, this stuff is so sticky there's no room for error, when it's down it's down).


Take the plastic off the tape and cover with glitter use a scrap of paper to rub the glitter and make sure it sticks.


A few scrap pieces of silver paper (I cut these for him and he stuck them down).


Tuesday, 30 July 2013

Brayered Christmas

A brayered winter scene Christmas Card

This lovely Christmas scene was done using my brayer the lovely as a tree stamp set from Stampin' Up!


I love how it turned out and I made a little how to video which you can watch.


I used midnight muse for the background and chocolate chip for the tree. I used the glossy card stock, which sadly we must say goodbye to. It would work well with whisper white also.

Here is a closer look at the card.


If you want to buy the products to try this one out for yourself please contact me marianardone.mn@gmail.com you can also visit my site Maria Kitching Stampin' Up! where online ordering will soon be available. Woop! Woop!


Friday, 12 July 2013

Elegant Butterfly Card

Super simple card using the love blossoms stampin' around wheel.


The little bow is made from paper strips and it's finished with a pearl. I love the simple look which is emphasised even more with basic colours black and vanilla.

Sheer elegance!!

Friday, 26 April 2013

Blackboard Technique For Masculine Cards

Feeling Sentimental


The boy's nursery have asked me if I'd like to have a stall at the nursery fun day. So I was looking over what cards I have, trying to plan what I might like to make, and I have hardly any male cards.

I always find male cards so much more difficult to design and I know lots of other crafter's that say the same thing.

Feeling Sentimental, stampin' Up, blackboard technique, handmade cards, heat embossing


I was also shown the blackboard technique a few weeks ago at our Stampin' Up! Team Meeting and I've been itching to try it again. I love when I see a technique that I like and I actually have all the supplies I need so I can try it straight away.

Feeling Sentimental, stampin' Up, blackboard technique, handmade cards, heat embossing

I hope you like this one.

Thursday, 6 September 2012

Gift bags

These are very cute little handbag gift bags


I love making these because they're really simple but look great. They make excellent gift bags or a nice little holder for some note cards.

handmade gift bags, stampin up, patterned papers


Still using up my Everyday Enchantments Designer Series Paper.


Update:
I have added a video tutorial for hot to make these lovely gift bags. Gift Bag Tutorial

Tuesday, 20 March 2012

Wedding Card

This card is for my cousin who gets married on April 13th. The wedding season has arrived! The colours are rich razzleberry on very vanilla and I've added some interest to the background with some paper piercing.

stampin up, handmade wedding card

I used a doily stencil I had as a guide for the paper piercing but a paper doily would also work.

Wednesday, 16 November 2011

Handmade Christmas Crackers

Have a go at these Handmade crackers, you can really personalise them plus you get to choose an individual gift for all of your guests.


Supplies:
  • Holly  Berry Bouquet Speciality 12x12 paper
  • toilet roll holders
  • ribbon
  • pines and poinsettias stamp set
  • Inks
  • cracker snaps
  • Joke/riddle
  • paper hats/ masks
  • adhesive snail, sticky strip and stampin dimensionals
  • Paper trimmer and perforator

Method:


  • Trim one edge of your paper so it is 20cm long,giving you an oblong.

  • Make two perforated lines paralel to the short edge, 10cm from the edge of both the short sides. 


  • Glue the cracker snap in place along the long edge, leaving enough space for the sticky strip.
  • Put a length of sticky along the edge of the paper.


  • Place the three toilet roll holders along the edge, opposite the sticky strip.
  • Roll the paper around the toilet roll holders. When you near the edge pull off the backing for the sticky strip and stick the paper down. 


  • Line the toilet roll holders so that the middle one is central.


  • Pull one of the end rolls out slightly (around 2 finger widths) and then gently squeeze the gap between the rolls  using the length of your pointing finger and your thumb. Pull it out a bit more and squeeze it again. Repeat this a few times. Now, gently, twist the end roll slightly then push the two rolls together again.


  • Now it's time to fill your cracker with your gifts and jokes etc.
  • Once you have everything inside repeat the previous step to close the other half of the cracker.
  • Tie the ends with ribbon and then embellish with your own stamped images, beads, buttons, ribbons or whatever might take your fancy.( I only had whisper white ribbon so I coloured it with the real red stamping pad.)

The colours that co-ordinate with the paper pack are cherry cobbler, real red, chocolate chip, very vanilla, so safron and wild wasabi.

To purchase any of these or other products email marianardone.mn@googlemail.com.