Pages

Saturday 31 May 2014

Retired list and a sketch challenge

Follow my blog with Bloglovin

It's been a very busy month and I fell like I'm playing catch up all the time. When you never have enough time to do everything you want to get done and it seems like the more you try to do the less there is that actually gets done.

First things first, the retired list has come so get your favourite stamp sets before they're gone.


I had a few minutes "free" time and I did a quick sketch challenge over at hand stamped sentiments.


I had to make it a really simple, quick card cause that was all I had time for and I liked how it turned out. It's the first time I've used stitching on a card and even doing it by hand didn't take long.


I glued the pennant down first but I glued only the top edge to give the impression the stitching was holding it.


Please remember you can purchase all of your stampin' Up! supplies, directly from me, through my Stampin' Up! store.

Supplies Used:

Perfect Pennants Clear-Mount Bundle 134816
Card Stock A4 Baked Brown Sugar   131301
Crisp Cantaloupe Classic Stampin' Pad 131176
Coastal Cabana Classic Stampin' Pad 131175
Strawberry Slush Classic Stampin' Pad    131178
Pistachio Pudding Classic Stampin' Pad 131177

Here are some more projects you may like:


Tuesday 27 May 2014

Bendi Card Using Stampin' Up! The Open Sea

The Open Sea is a great set and is incredibly versatile, I like it so  much I think I have used it for every Fathers day and every birthday my Dad has has since it was released.

Fathers day again soon and I've been thinking I need to get a new set cause my poor old Dad must be getting sick of the sight of this but he loves boats and I love using this set so much that I've used it again and I think my Dad will love this.


This is a bendi fold card, which I have never done before and I got some inspiration for the card shape while looking through my pinterest boards Tips and Tutorials. There was a video tutorial pinned there, I used my own measurements as I like to work in cm's.

Follow Maria Nardone's board Tips and tutorials on Pinterest.

The background was done using the world map background stamp, to colour the image I used a watercolouring technique using a clear block and Stampin' Up! markers.

I used a brayer and island indigo to give the graduated colour tone on the flaps. For the foreground I stamped the first layer of images in island indigo and the top layer in night of navy.


Supplies Used:
The Open Sea - Clear-Mount Stamp 123032
World Map 130345
Many Marvelous Markers  131264
Island Indigo Classic Stampin' Pad 126986
Night Of Navy Classic Stampin' Pad 126970
Brayer And Rubber Attachment 102395


You may also like to look at some of my other projects:


Tuesday 6 May 2014

Birthday Banner with Stampin' Up! My Digital Studio

I have to admit, I've not used my digital studio a great deal and am still getting to grips with it.

Cameron was having a pirate and mermaid themed party for his birthday and I wanted to make a banner which he could still have some use of after the party.


The banner is now hanging in his bedroom and I am very pleased with how it turned out.

I don't have an electronic cutter which is compatible with MDS so I have printed these, on my home printer, onto whisper white card stock and then I cut them using my big shot and the banners framelit dies.

Supplies Used:
Banners Framelits Dies 132173
Mds Download - Digital Download 130646
Ahoy, Matey Ensemble - Digital Download 130078
Designer Rosette Bigz Xl Die 125594

All Stampin' Up! Supplies can be purchased online in the UK.

Other posts you may like:


Free Photopolymer Stamps from Stampin' Up!

Stampin' Up! will be introducing a range of polymer stamps in the new 2014-2015 catalogue. 

I have to admit I'm not a fan of polymer stamps, I haven't found any (thus far) that give me the same quality of stamped impression as rubber stamps but I will try to keep an open mind.

There is no time better than the present to give them a go as you can have them free and that's my favourite kind of stamps.

Throughout May an order for £60 or more from the Stampin' Up! range will earn you one free set of photopolymer stamps.


I must admit I am looking forward to having a try, there is certainly nothing easier when it comes to placement of your stamps.

You can purchase all of your Stampin' Up! supplies through my online store.

Monday 28 April 2014

Collage Technique with Stampin' Up! Papaya Collage

Thought I should make this post a good one, since I've been slacking a bit lately. We took a lovely little last minute trip to Amsterdam, and I had no time to post before we went. 

Excuses made, lets get on with the show.


Collage card using the papaya collage stamp set

I love projects that begin with a blank piece of paper, full of potential, waiting to be transformed. In this case I've used very vanilla for the front and naturals ivory for the base.


supplies required for collage technique

Mask off a section of the card where you will make the collage.


Shows area to be masked for collage technique


Use versa mark on the frame stamp to clear emboss some patterns for the background. 

Clear emboss on background

Use some stampin' Sponges and classic stampin' pads to colour the masked area, I used pool party and pear pizzazz. When done wipe with a paper towel to remove any ink which is sitting on the embossed areas, this ink will not dry so needs to be removed.


Using pool party ink pad, stamp some leaves randomly over the space. Remember to wipe away any residue sitting on top of the embossed areas.

Stamp leaves in pool party

Use pear pizzazz to stamp the circular frame randomly across the space and wipe off any excess.

Pear pizzazz frames stamped randomly

To add more depth stamp a few of the flowers in basic grey.

Stamp a few Basic grey flowers

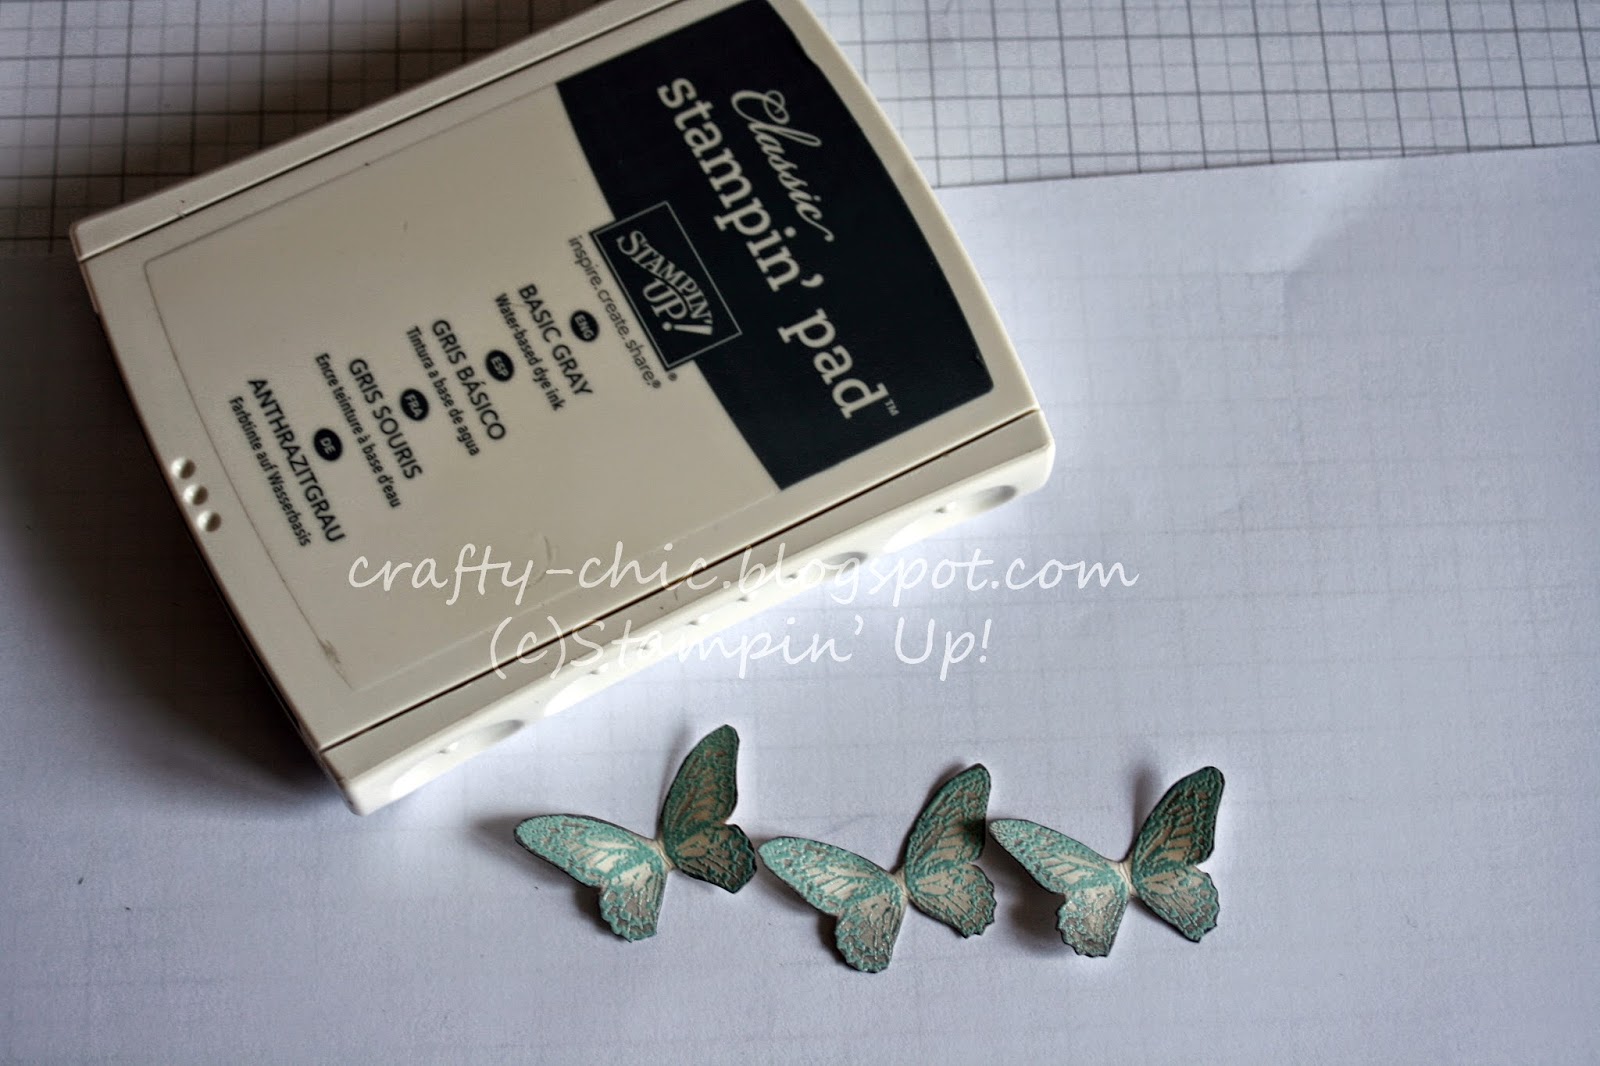
Heat emboss three butterflies with pool party embossing powder and cut round them.


Emboss butterflies with pool party embossing powder

Ink the edges of the butterflies with basic grey ink.


Ink edges with basic grey

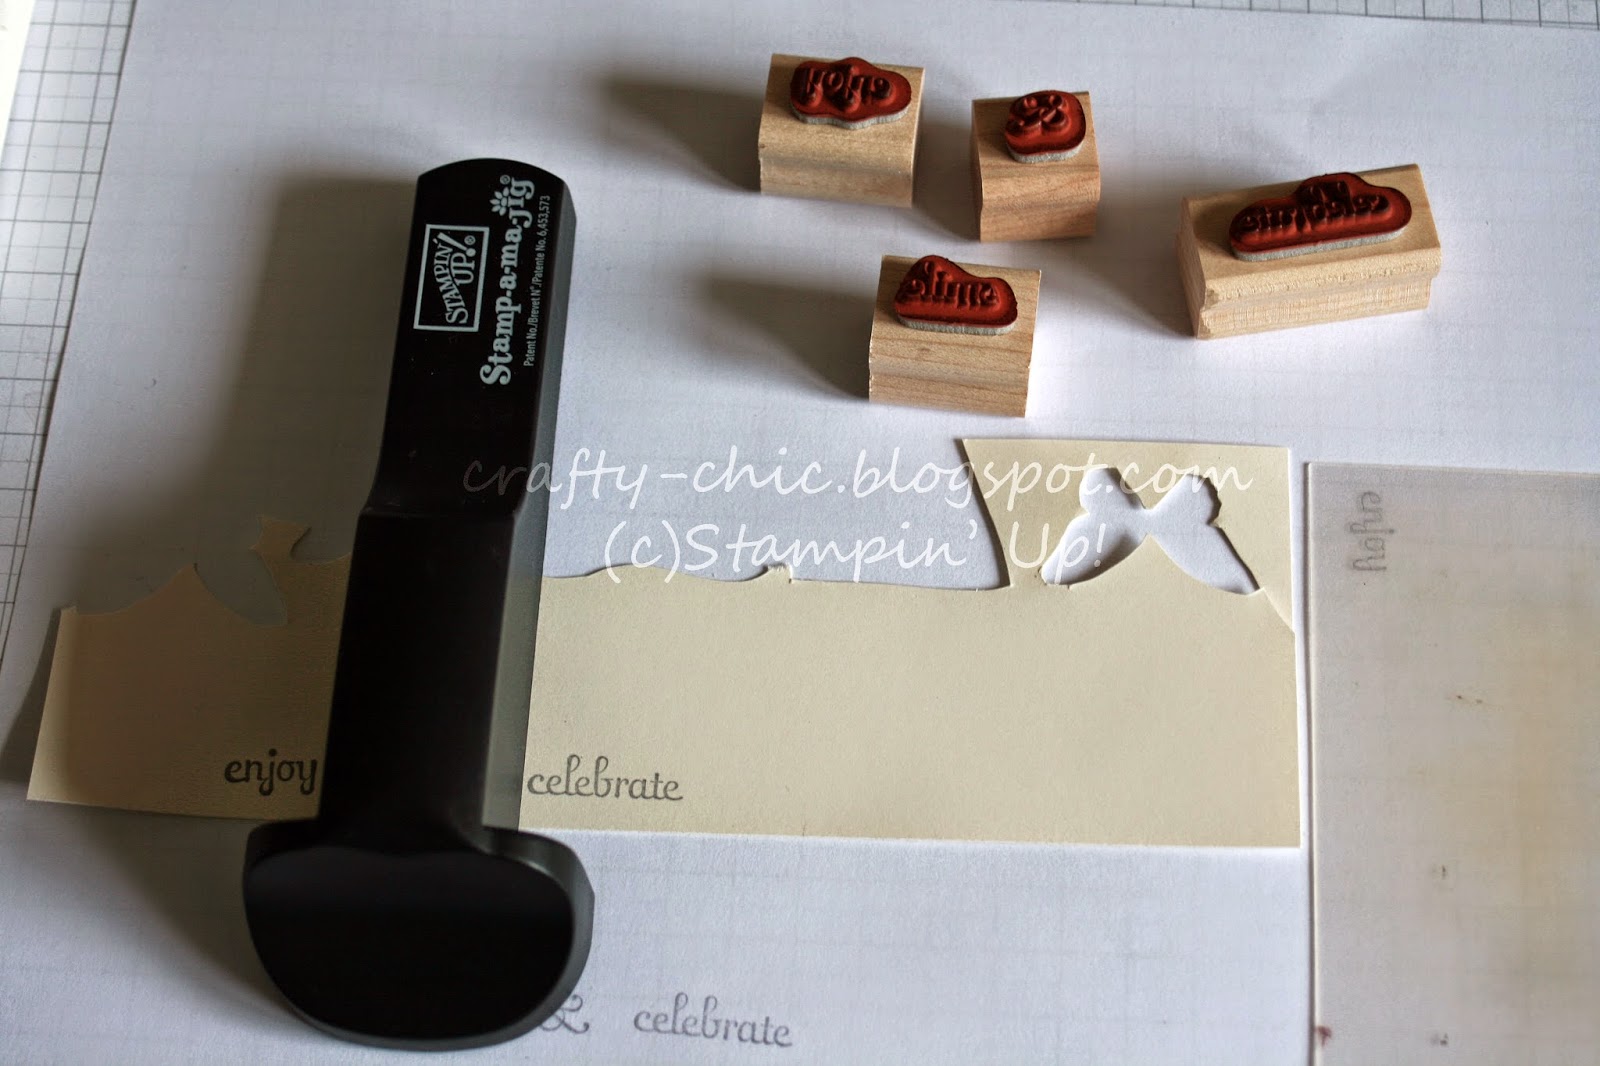
Use fabulous phrases along with the stamp-a-ma-jig to stamp the words enjoy, smile & celebrate in basic grey on a scrap of very vanilla. Trim around the phrase and ink the edges.


Fabulous phrases in basic grey

Assemble the card and admire your work!!

To purchase the supplies to make this project, Stampin' Up! Online.

Stamp sets
Papaya Collage Clear-Mount Stamp Set 126612
Fabulous Phrases - Clear-Mount Stamp 120501

Ink
Pool Party Classic Stampin' Pad 126982
Pear Pizzazz Classic Stampin' Pad 131180
Basic Gray Classic Stampin' Pad 126981
Versamark Pad 102283

Paper
Very Vanilla A4 Card Stock 106550
Naturals Ivory A4 Card Stock 108630

Embossing Powders
Pool Party Stampin' Emboss Powder 129398
Clear Stampin' Emboss Powder 109130

Tools and accesories
Heat Tool - Uk Plug 129054
Stamp-A-Ma-Jig 101049
Stamping Sponges 101610

Other projects you may like:
  

Sunday 13 April 2014

Sweet Sorbet Designer Series Paper Photo Book

Final Sale-a-braition project

It's still not quite finished, I have a few more areas I want to embelish more but I'm posting it as it is. 

I don't want to wait any longer as it's already more than a week since sale-a-braition ended.

I will add the last few finishing touches as I'm choosing the photographs. I thought the best way to let you all see it was with a quick video, I will try to post some nice pictures of it once it is completely finished.

The book itself was inspired by something I saw by Laura Denison, I made my version as A4 and decorated it with a whole host of sale-a-braition goodies. 


To purchase your Stampin' Up! supplies, Stampin' Up! Online.

You may also like to see:

Wednesday 9 April 2014

Stampin' Up! Weekly deals

Every week in April Stampin' Up! are offering "weekly deals".


The deals will be announced every Wednesday and and will run for 1 week.

Find out what this weeks weekly deals are, buy Stampin' Up online.

Wednesday 2 April 2014

Bye Bye Sale-A-Braition

Sale-A-Braition Finished For Another Year

My Favourite time in the Stampin' Up! Calender is at an end. Boo Hoo!!

If you still have some of the free goodies left then wait!!


I have one last sale-a-braition project to post!!

It's a large project and has taken me longer than I had anticipated so please be patient and check back soon.

If you want a sneek peek then check out my facebook page.

Stampin' Up! Crafty Chic

Tuesday 1 April 2014

Stampin' Up! Undefined Kit

Using My Undefined Carved Image


Hand Carved Stamp with Stampin' Up! Undefined Kit

I originally carved this image back in January, for my sister in laws birthday card.


Please excuse the photograph, it was a quick snapshot before I had to run out the door.

The kit has everything you need to carve your image, you only need to provide the imagination which is not as easy as you may think.


The choice of image was perhaps a bit ambitious for my first attempt, the face in particular I had real problems with. I spent a long time trying to get the face right. Eventually when I had ran out of time (she was still looking like she'd gone a few rounds with tyson) I decided it was best to take away the facial features completely. I figured I could probably draw them in better than I could carve them.

I seen a product recently and the packaging design had a vintage look, it made me think about this stamp so I decided to use it again.

Stampin' Up! Undefined Kit, Carve Your Own Stamp

I need more practise with the colouring but overall I'm pleased with how this turned out and it was good to use the image again as I did spend quite a bit of time carving it.

Products Used:
Stripes Textured Impressions Embossing Folder Die 123128
Undefined Stamp Carving Kit 133402
Hello Lovely 130243
Whisper White A4 Card Stock 106549
Brushed Silver A4 Card Stock 124918
Pink Pirouette A4 Card Stock 116203
Many Marvellous Markers 131264

I also made a gift box using the stamp.


Fancy Opening Box


I only used black this time when I was colouring, I was thinking about a black and white photograph but I fell short of the mark, I'm afraid.

I'm still including it in this post because I'm so pleased at how the box turned out. There is a very short video which shows the box opening and closing.

Think the box will be my next video tutorial as it wasn't very difficult to make once I'd figured out the mechanism.


Other post you might like to take a look at: